
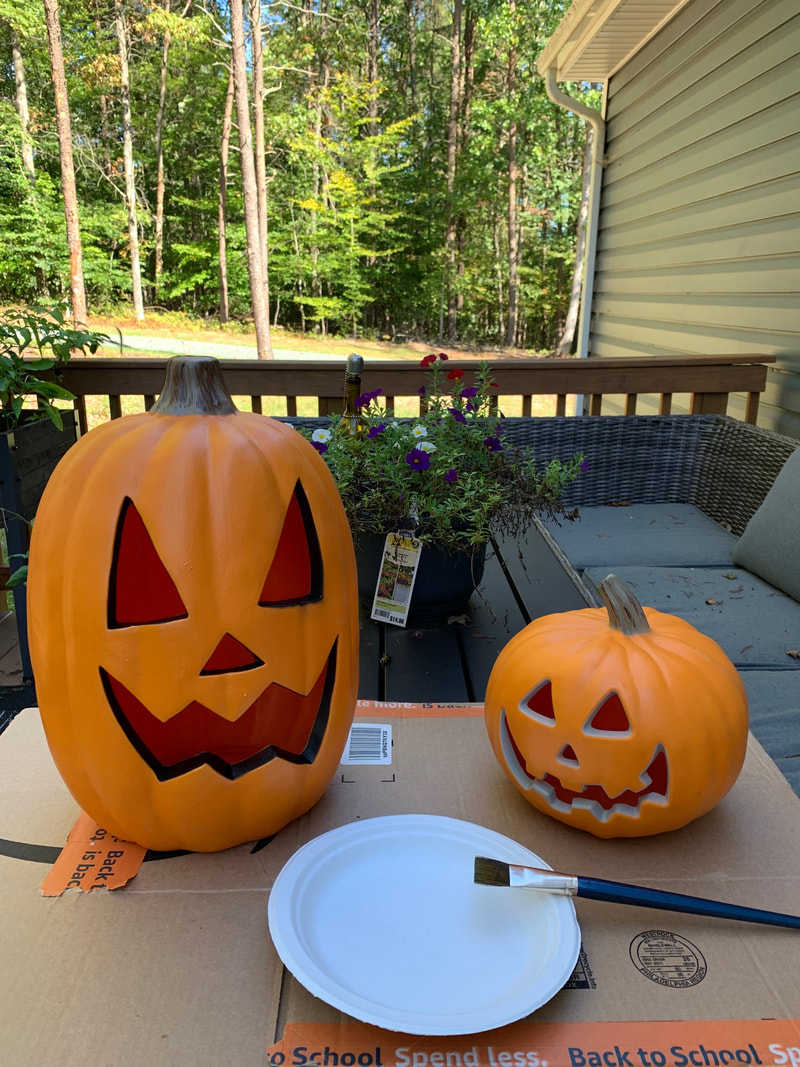
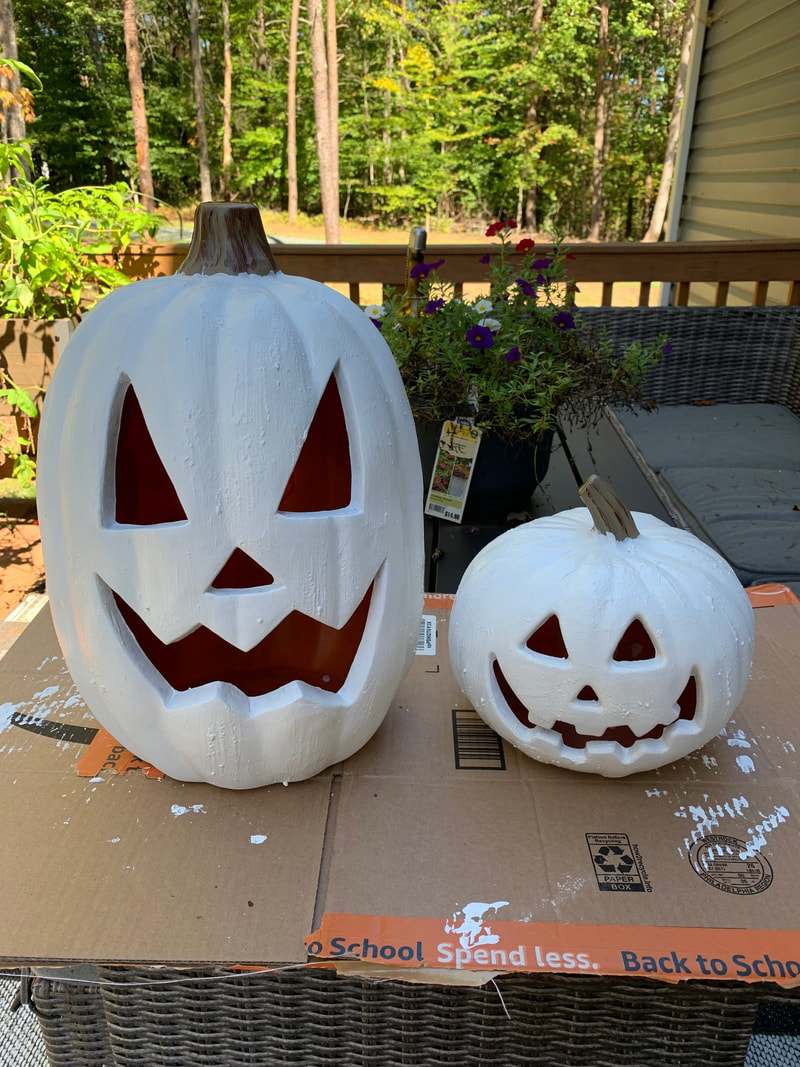
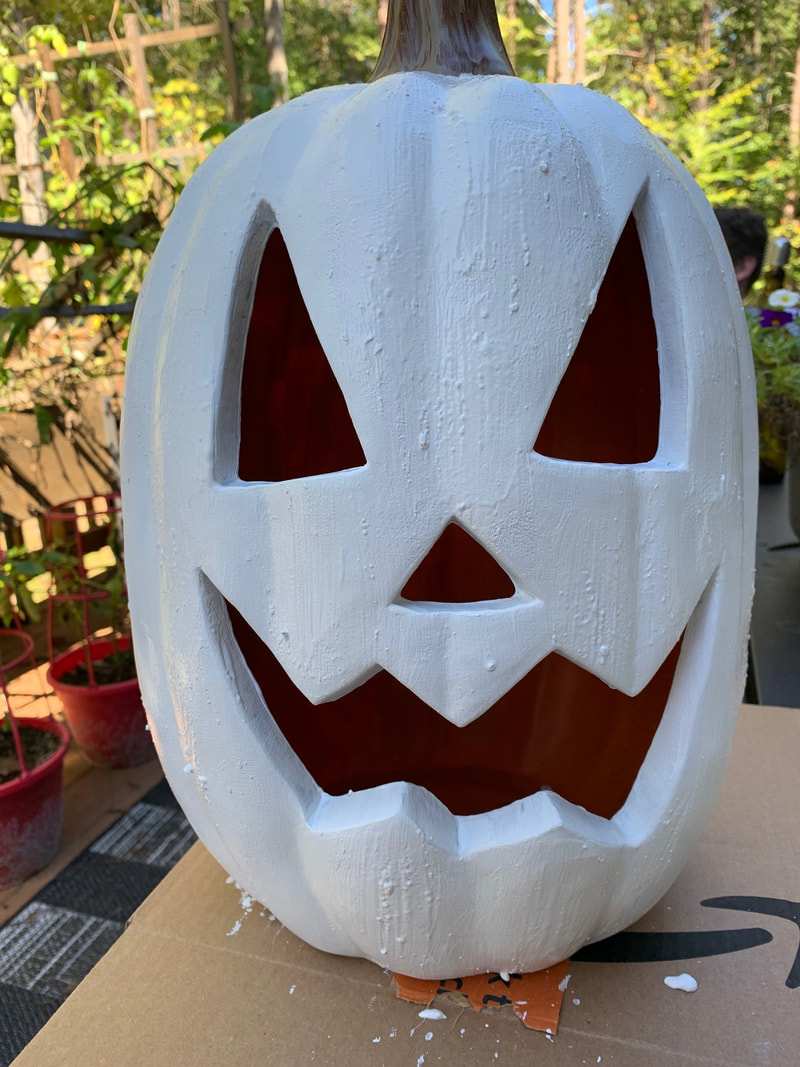
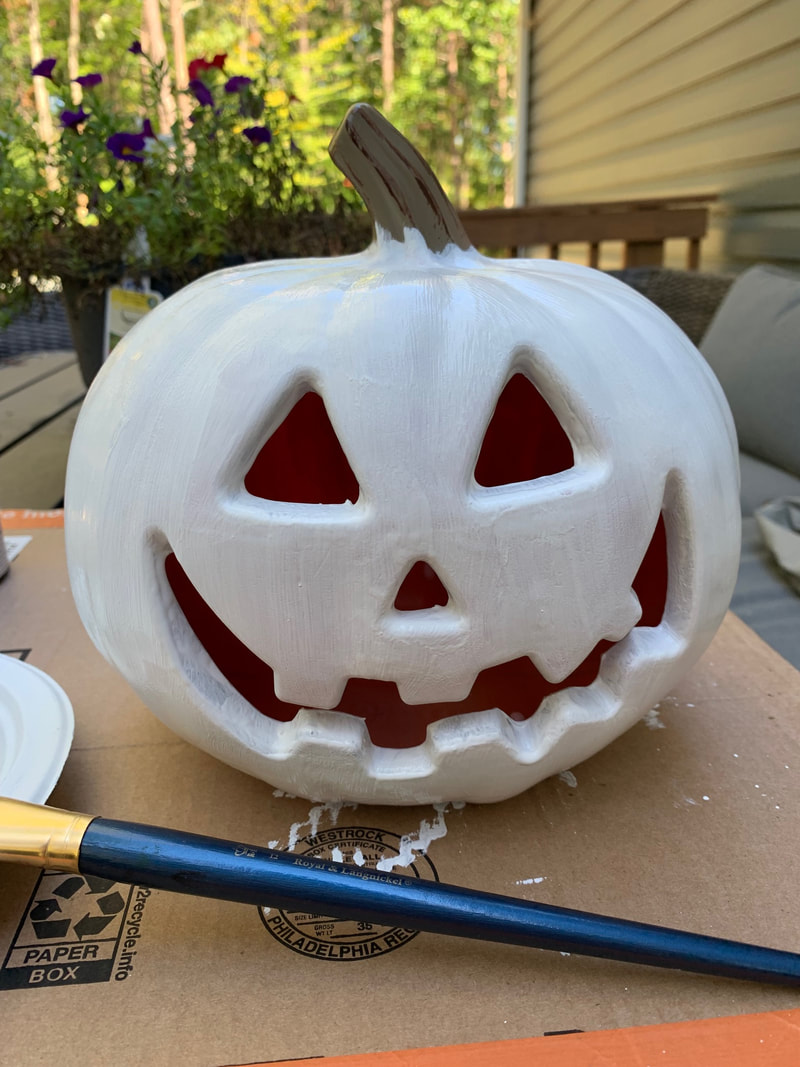
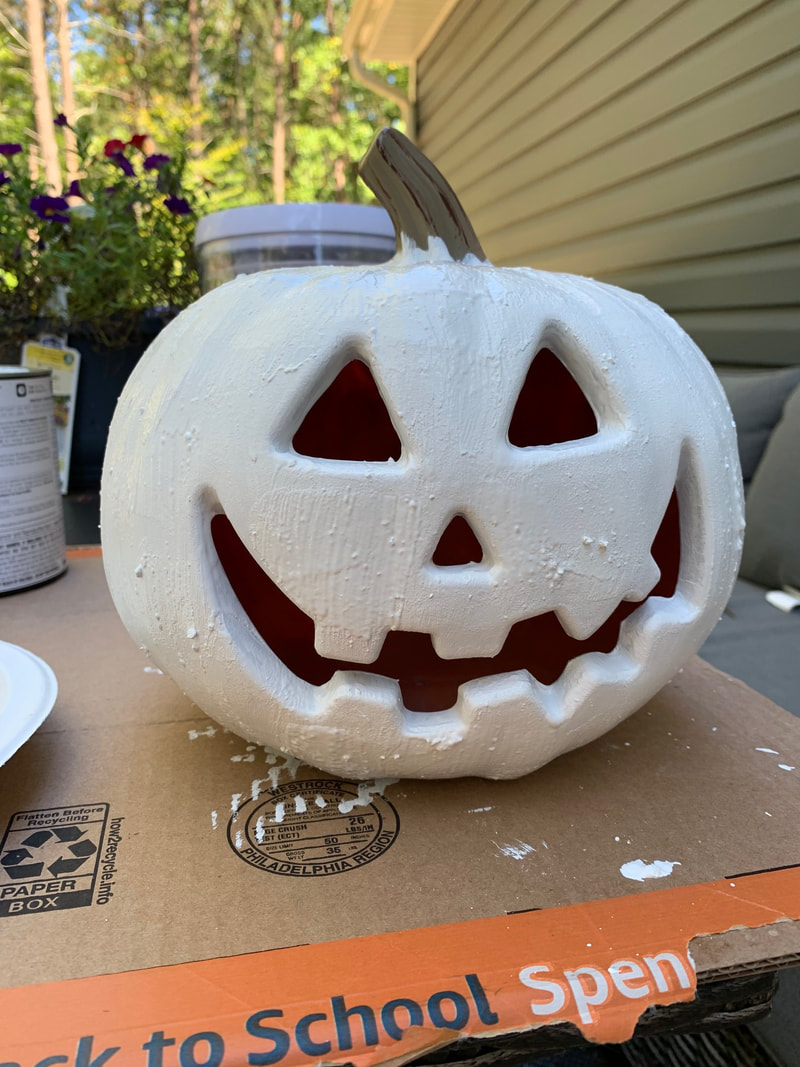
Hey friends! I have a fun DIY for you! I saw these little plastic pumpkins and I thought painting them would really elevate their look. I LOVE fall, I’m not usually a big fan of Halloween, but I thought these were too cute. What You’ll Need: Plastic Pumpkins- I found these at the local Walmart. Large Pumpkin, Small Pumpkin Paint- I used white chalk paint. It’s what I had at home. Paint brush All-Purpose Flour Paper Plate Cardboard box/ something to paint on So what did I do? I removed the light out of the back of each pumpkin. I painted my pumpkins with two coats of chalk paint. I think this was a good and consistent look. I painted on a cardboard box to protect my table. I started out painting around the eyes and mouth. Once everything was dry, I decided to add some texture to my pumpkin. I added a little bit of all-purpose flour to the paint to make a paste with the flour. I painted one more coat on the pumpkins to get this cool texture. I let the pumpkins dry, added the lights back in and styled them on my porch. This was around $20 and I will be able to use them from year to year! I think they turned out great!

0 Comments
Leave a Reply. |
AuthorI’m Kelly, a newlywed with some big dreams, a love for people, and a desire to help create memories. I also love finding deals on fashion and home finds to share with my followers. Categories
All
|

 RSS Feed